

To change existing PDF text, open Edit PDF and click Edit text. Click a line to correct it, select several regions to format them together, or drag a rectangle to rewrite a paragraph. This guide follows one workshop notice through all three changes, then helps you find the editor's other tools.
Open your PDF and find the text
Open Edit PDF, select your document, and navigate to the page you want to change. Keep the original file so you can compare the finished copy with it.
Choose Edit text. The editor inspects the page and marks supported text regions. A PDF may store a sentence as several separate regions, so look at what is selected before typing. Zoom in when a line is small or close to another object.
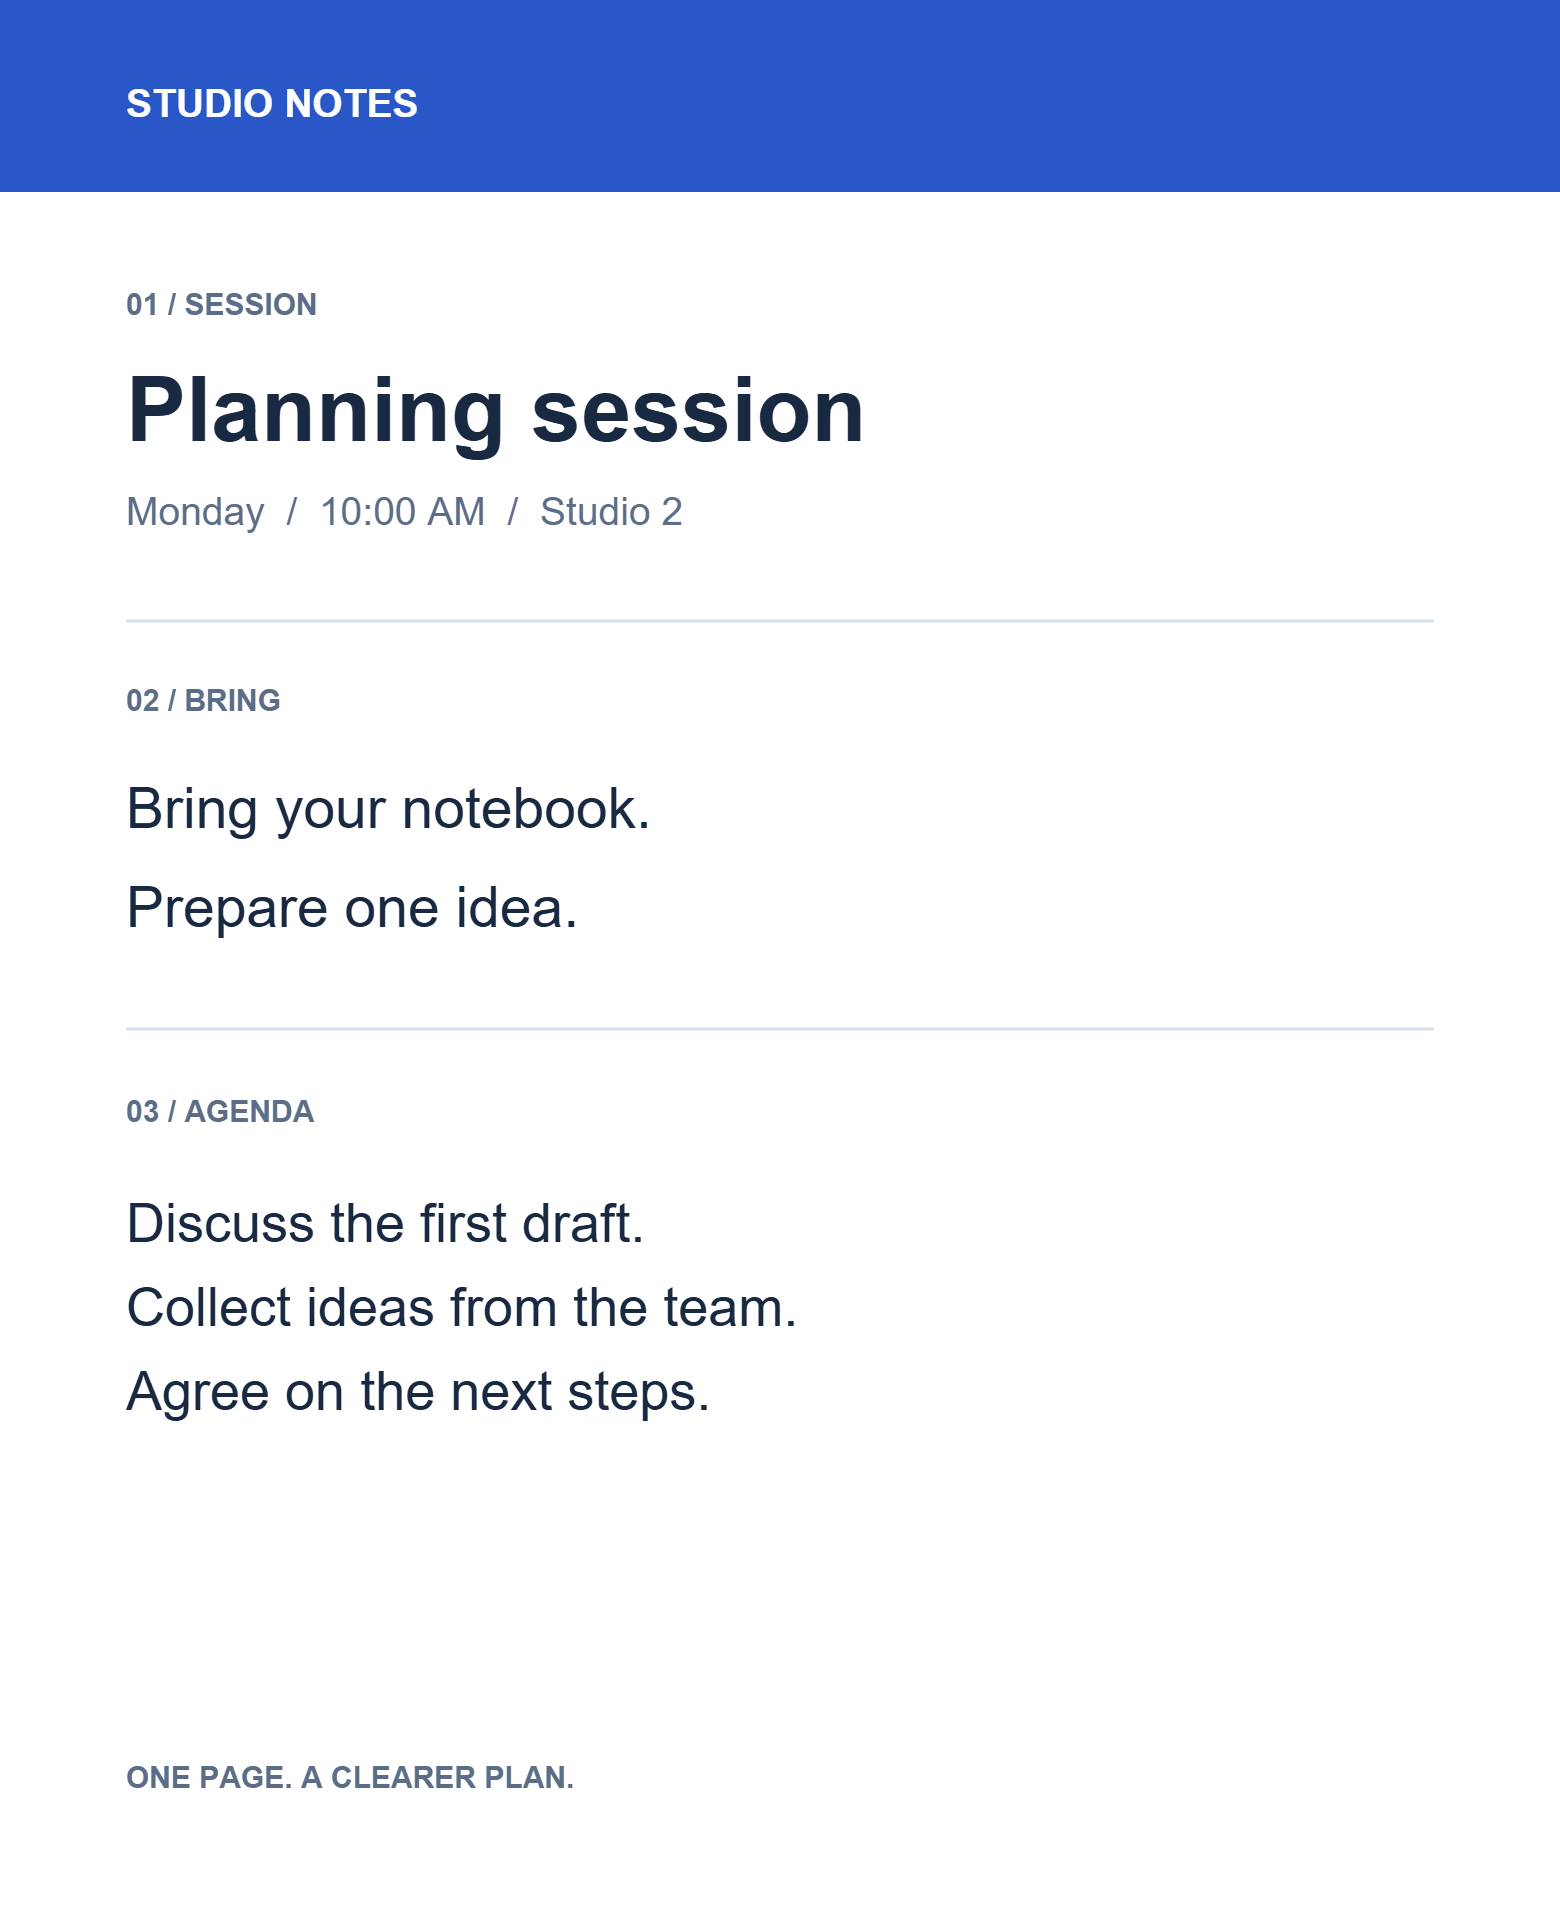
Our example is a one-page workshop notice with ordinary selectable text. The title, preparation lines and agenda are separate parts of the page. You can follow the same approach with a heading, address, meeting note or short document.
If the page is a scan, the words may be pixels inside an image. Direct text editing is unavailable for image-only pages and some hidden OCR layers. Use OCR PDF to extract their text; OCR does not guarantee that the original page becomes directly editable here.
Edit a single line of existing text
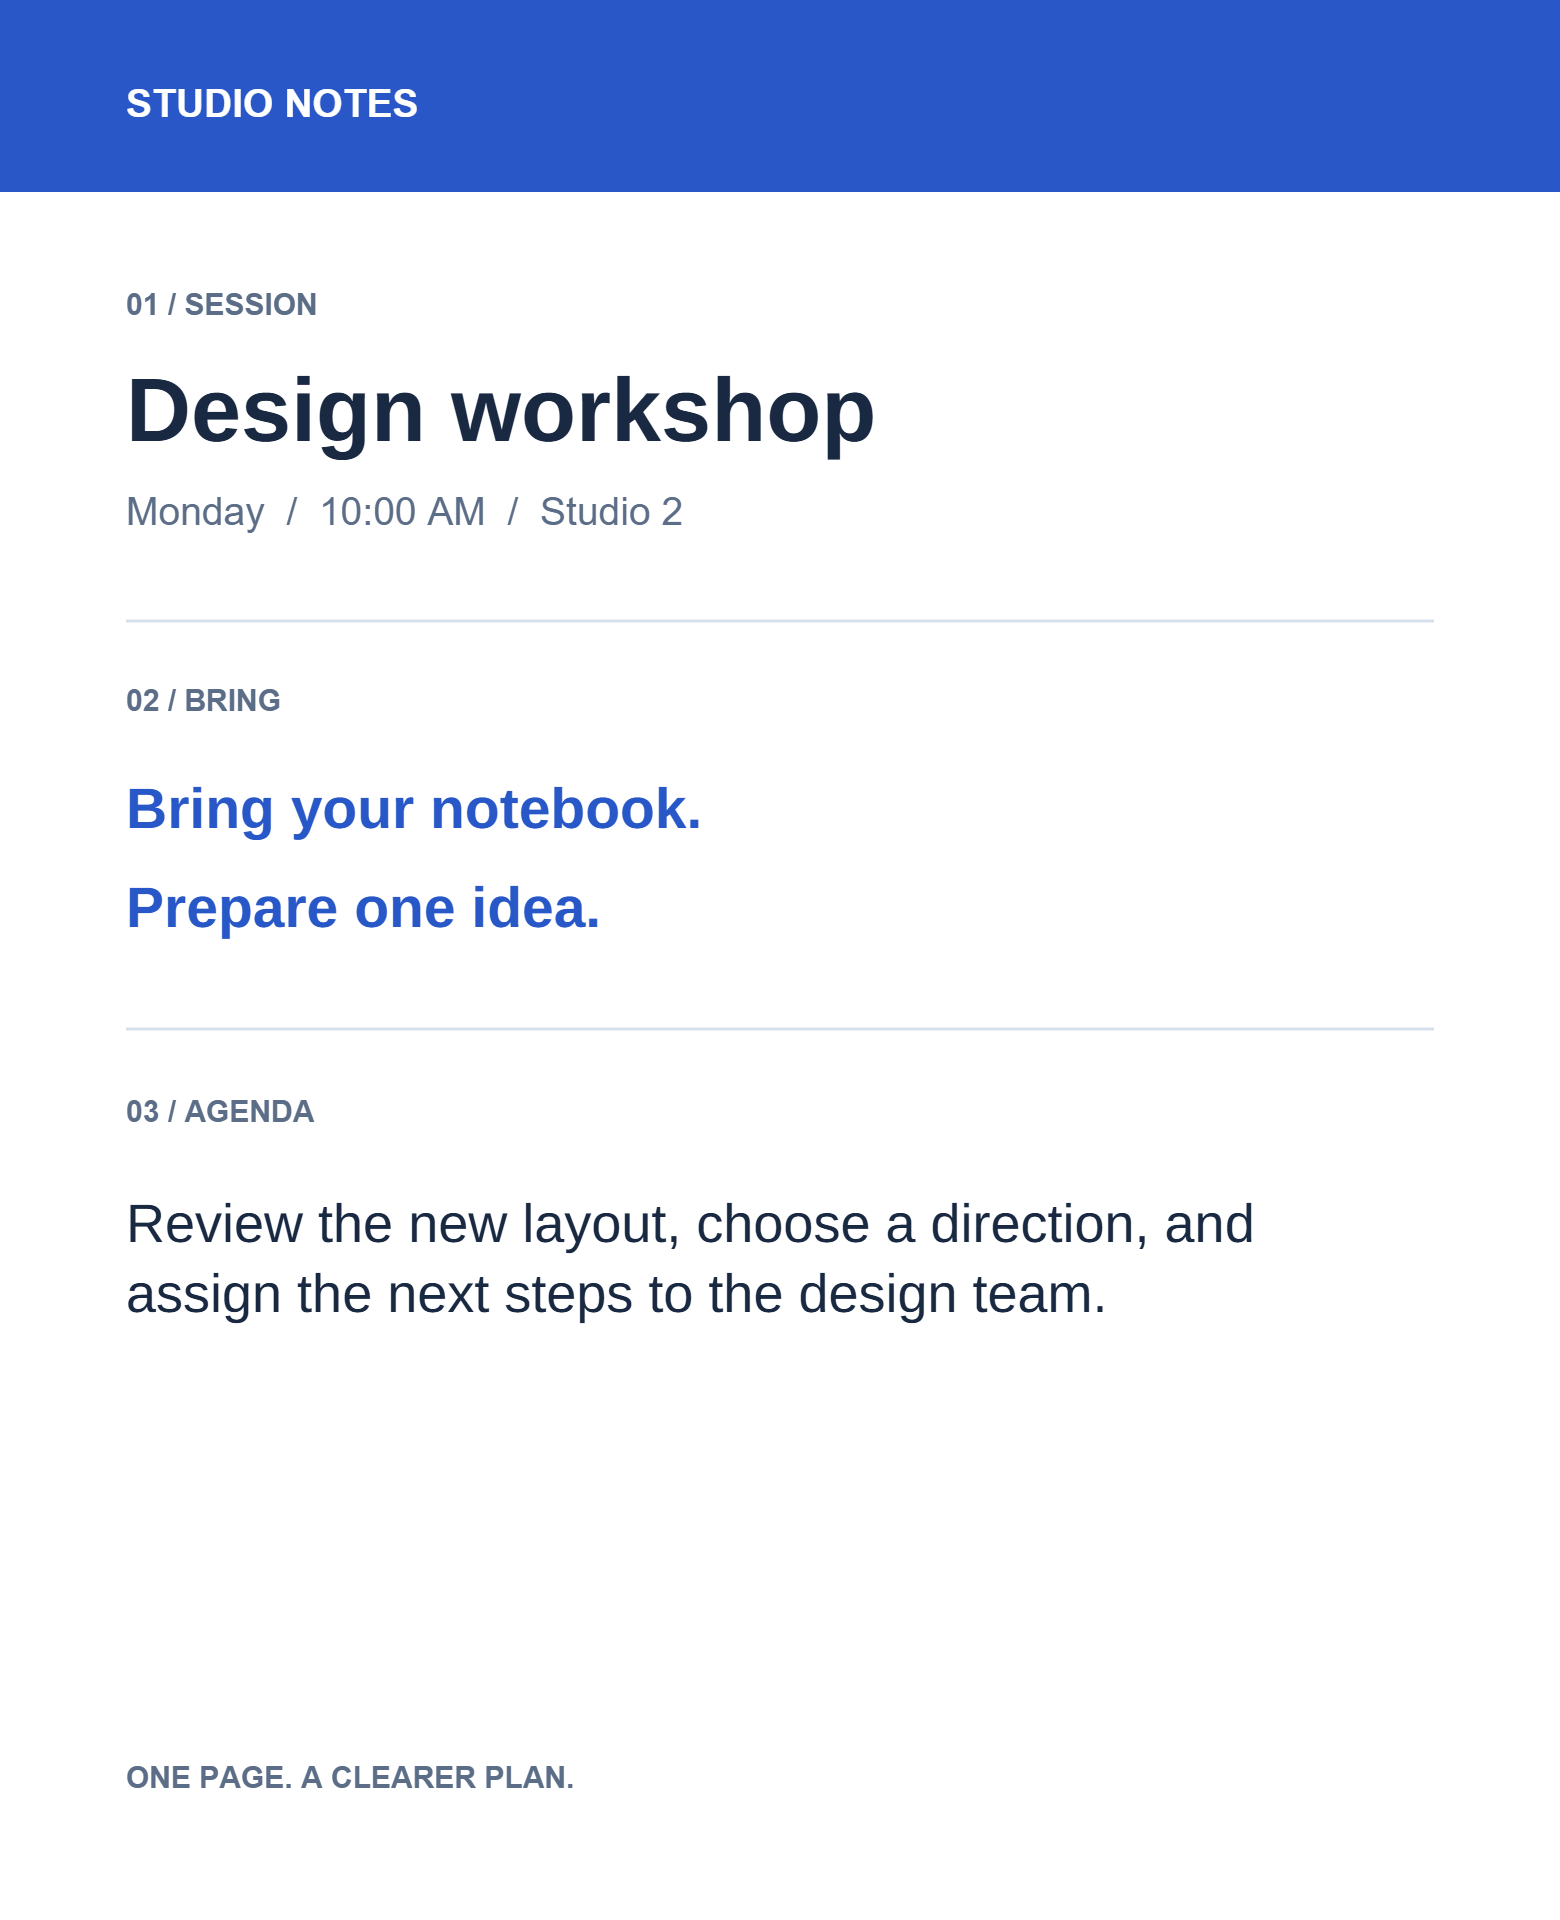
Click Edit text, then click the text region to edit. Place the cursor where you need it, select the words to replace, and type the correction. In our notice, we replace Planning session with Design workshop.
Use the floating text controls to adjust the font, size, color or alignment. The font-size slider changes size in whole-point steps. Selecting characters applies formatting to those characters; with no character selection, formatting applies to the whole active text box. Review any font-substitution notice because a replacement font can change spacing.
Click empty space on the page to finish this edit. You can also press Ctrl + Enter on Windows or ⌘ + Enter on macOS. Escape cancels the current edit. Finishing keeps the change in the editor; you will create the downloadable PDF in the final step.
For longer replacement text, check the result against nearby content and the page edges. Reduce the font size or shorten the wording if it extends too far. To rewrite several lines together, use paragraph editing below.
Select and format multiple lines together
While Edit text is active, open Settings and check Enable multi-select. Click or tap each region to add it to the selection; select it again to remove it. On a desktop, you can also hold Shift while clicking to add or remove regions without enabling the checkbox. With the checkbox off, an ordinary click edits just that region.
In our example, select Bring your notebook. and Prepare one idea. Set their text color to blue, #2857C7, and enable Bold in the font controls. Both lines receive the same styling while keeping their own wording and positions. Click empty space to clear the selection. The formatting stays in place, and Enable multi-select remains checked until you turn it off.
This is useful for matching several headings, updating a group of labels or moving selected text together. Multiple selection keeps the regions separate. To rewrite several lines as one continuous passage, combine them as a paragraph in the next step.
Rewrite several lines as a paragraph
Leave Edit text active and uncheck Enable multi-select. With a mouse or pen, drag a rectangle around the paragraph's original lines, then release. The paragraph editor opens automatically. In our example, the rectangle encloses the three agenda lines beginning Discuss the first draft. Start the rectangle outside an active text box so dragging inside that box can still select characters.
On a phone, check Enable multi-select in Settings, tap the lines you want, then choose Edit as Paragraph in the floating toolbar. This combines at least two supported original text regions with the same line direction into one editable text box. You can also use this action after selecting lines with Shift + click on a desktop. Normal touch scrolling remains available.
Select the text in the new box and replace it with your paragraph. Our replacement is: Review the new layout, choose a direction, and assign the next steps to the design team. The exported example wraps this sentence across two lines.
The combined paragraph wraps within its text box. Adjust Text width to the available space; our example uses a width of 410. You can refine size, alignment and line spacing, or insert a line break. Check the last line, then click empty space to finish the edit.
The paragraph wraps inside its own box on the current page. Other page objects stay in place, and extra text does not flow onto the next page. If it becomes crowded, shorten the wording, adjust the box or reduce the font size.
Add the finishing touches you need
Existing text is only one part of the editor. After finishing a text edit, choose another tool for the next task. These are useful starting points; the comparison above demonstrates the three text workflows.
Add new text or an image
Use Text for a new caption or label, and Image for a logo or picture. Position and resize the addition on the page. Image crop, flip and replace controls work on images you insert.
Mark up a document
Use Highlight, underline, strikeout or squiggly marks to call attention to text. Add a note, draw freehand, or use shapes and arrows to explain a change.
Add a signature or stamp
Use Sign to draw, upload or type a signature and place it on the page. Stamps and badges help label a document. A visible signature is not a certificate-based digital signature.
Work with forms and tables
Add supported form fields for text, checkboxes or choices, and work with supported existing fields. Use the table tool to add a grid of editable cells when you need a compact structured layout.
Organize and connect pages
Use the page controls to import, duplicate, delete or reorder pages. Add links and bookmarks to help readers navigate. For a focused page-removal task, try Remove Pages from PDF.
Remove sensitive content
Use Redact, mark every occurrence and apply the redaction when exporting. Review the downloaded copy before sharing. A normal rectangle or highlight does not remove the information underneath it.
Review and download the edited PDF
Review each changed page at a comfortable zoom. Check replacement words, font spacing, paragraph endings and nearby objects. Use Undo if a change needs another pass, and inspect any warnings before exporting.
Choose Start to create the edited PDF, then save the available download. Open that downloaded file in a PDF reader and inspect it again. In our verified example, the new title and paragraph remain searchable, the two preparation lines are blue and bold, and the date, rules and footer remain in place.
If you want to continue later, use Save project and save an .i2pdf project as well. Use Resume project to reopen that work in the editor. A project preserves editable changes; previous undo history is not included. Share the exported PDF when someone needs the finished document.
Common questions
Does editing existing text actually replace it?
For supported text regions, Edit text removes the original glyphs and writes the replacement into the exported PDF. In our example, the old title and agenda wording are absent from the downloaded text. The separate Text tool adds a new text box. To remove confidential material, use the dedicated Redact workflow and review every occurrence.
Why can’t I select some text?
The page may be an image, have a hidden OCR layer, or contain text with an unsupported structure or unreliable character mapping. Read the editor’s message. You can still add supported text boxes and annotations, or extract the visible wording with OCR.
Will the original font always be preserved?
The editor attempts to use a suitable document font. Embedded fonts can contain only a subset of characters, so a new word may require a replacement font. Review font notices, letter spacing and wrapping before saving.
Can I replace the same wording in several places?
Use Find & Act, choose the current page or whole document, review the matches and apply the intended replacement. Check the results individually when lines have different widths or fonts.
Is the PDF uploaded for editing?
Edit PDF processes the document in your browser. In the example used for this guide, the source PDF and export were handled locally without uploading the document. Download the finished PDF or save a project before leaving the session.
Make the page say what you need
Start with one correction, then work up to a full paragraph.